If you have a cracked device screen, you can save time and money by learning how to replace the screen of your iPad Pro 13 Inch device. Many people believe that replacing the screen of a device is a complex task, but with the right tools and proper information, it becomes a simple task to accomplish. This guide is intended for technicians, shop owners, and even for those who want to gain proper knowledge about the process.
We at Ishine Trade specialize in the wholesale of high-quality mobile phone parts and accessories, including the best replacement screens for long-lasting devices.
Why Screen Replacement Is Necessary for iPad Pro 13 Inch
The screen may also influence the look and functionality of your gadget. Whether you have a cracked glass screen or a malfunctioning touchscreen display, you may find yourself replacing your screen. However, learning to replace your iPad Pro 13 Inch screen helps you repair your gadget instead of buying a new one.
Replacing your screen may also save you from further damaging your gadget, which may cost you more to repair.
Understanding the Screen Replacement Process
Before you begin the repair, it is essential to understand that the iPad Pro 13 Inch screen is glued firmly, which requires a strong adhesive, and the internal connectors are very sensitive. The steps to replace the iPad Pro 13 Inch screen include heating the device, opening the device, removing the components, and replacing the screen.
Any person who wishes to replace the screen of the iPad Pro 13 Inch should do it very carefully without rushing, as a small mistake can lead to the damaging of the internal components of the device.
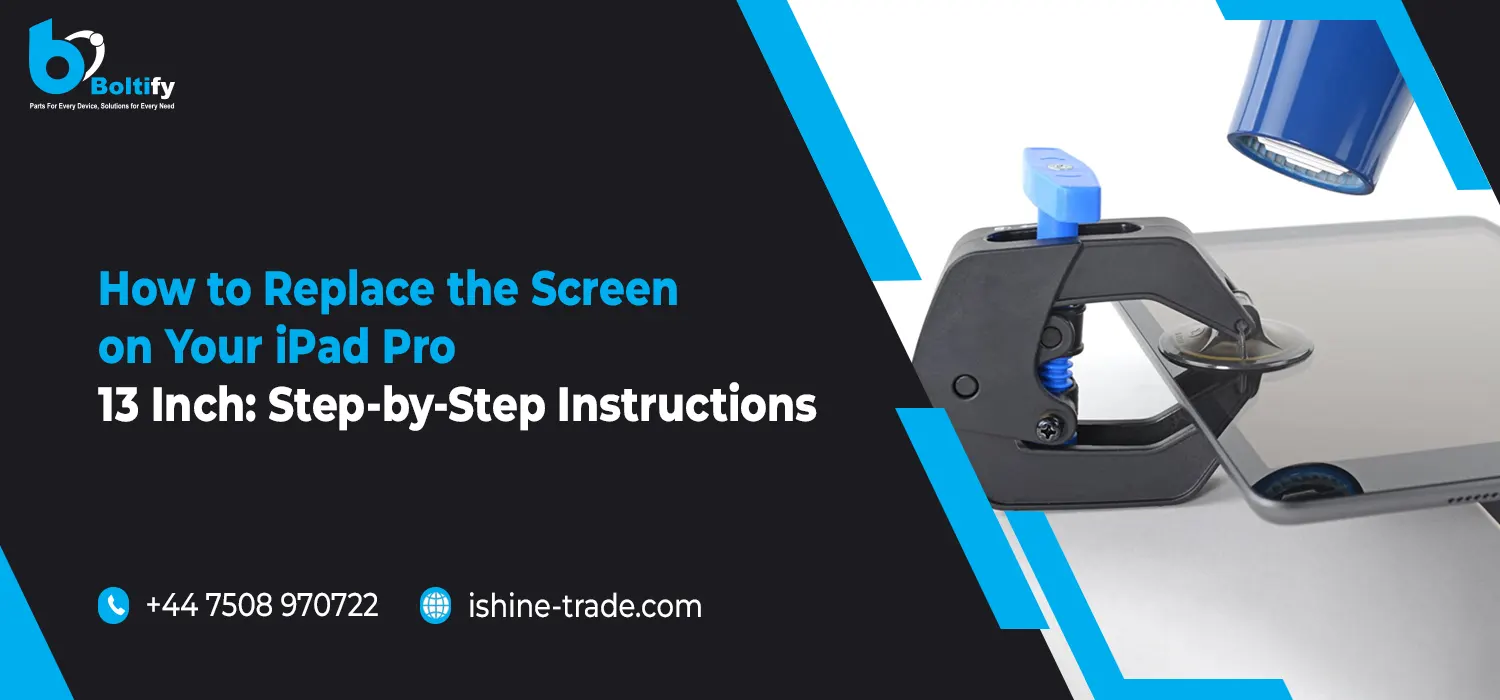
Step-by-Step Guide to Replace the Screen on Your iPad Pro 13 Inch
The process starts by carefully heating the edges of the iPad to loosen the adhesive that holds the screen in place. After loosening the adhesive, the screen can be carefully lifted using a suction cup and plastic tools. It should be noted that the process should be done slowly to avoid damaging the internal cables.
After successfully opening the device, the next step in the process is to disconnect the battery to ensure safety. This is followed by removing the screws and disconnecting the display connectors from the motherboard. After successfully disconnecting the screen from the motherboard, the damaged screen can be completely removed.
The next step in the process is to install the new screen by reconnecting the cables. This should be done carefully to ensure that the cables are tightly connected. After successfully reconnecting the cables, the screen should be replaced using new adhesive. The final step in the process is to power up the device to ensure that everything is functioning correctly.
This whole process has demonstrated how to replace the screen of your iPad Pro 13 Inch in a safe and effective manner.
Also Check: Google Pixel 6 Pro Screen Replacement: How to Save Money and Avoid Mistakes
Choosing High-Quality Replacement Screens
The quality of the replacement screen is an important factor in achieving success. Low-quality replacement screens can cause problems such as poor touch response, low brightness, and short lifespan. This is why professionals always prefer to deal with quality suppliers.
Ishine Trade is a reliable wholesale supplier of mobile phone parts and accessories. We provide high-quality replacement screens that meet industry standards. Selecting a good supplier is always beneficial in achieving success.
Common Issues During Screen Replacement
While learning how to replace the screen on your iPad Pro 13 Inch, many users face problems due to lack of experience. Some problems that users face are related to excessive use of heat, which can damage internal components of the iPad. Another problem that users face is related to improper use of connectors.
While working on your iPad Pro 13 Inch, one can avoid all such problems and ensure a smooth process.
Also Check: How to Replace iPhone 15 Charging Port: Step-by-Step Guide
Conclusion
Replacing the screen of a damaged device can be quite challenging at the beginning. However, after understanding the process of replacing the screen of your iPad Pro 13 Inch device, you can easily replace the screen. Using the right tools and quality screen replacements from reliable vendors like Ishine Trade will help you replace the screen of your device successfully without seeking any technical assistance.
FAQs
1- How long does it take to replace the iPad Pro 13 Inch’s screen?
The time required varies according to your experience; however, it generally takes 30-60 minutes to replace the iPad Pro 13 Inch’s screen.
2- Is it safe to replace my iPad’s screen?
Replacing your iPad’s screen is completely safe if you follow all the proper instructions and take good care of your iPad during the replacement process.
3- Where can I buy high-quality iPad replacement screens?
High-quality iPad replacement screens can be purchased from Ishine Trade, a reputable wholesale website dealing in mobile phone parts.
4- What do I need to do if my new iPad replacement screen does not function properly?
You need to check all the cable connections properly. If you still face problems, it is likely that your replacement screen is faulty.